In an earlier post https://seald-apps.com/how-to-build-a-phone-number-control-swiftui/ we have build a phone number control which can be used to capture a user’s phone number as part of an authentication flow. After this your server can send a verification code (a.k.a pincode) via a text message to the user.
Now we need a nice way to allow the user to enter this code, which is what we are gonna build in this post.
Our ContentView
Our contentView is pretty simple, we declare a @State variable for the pincode and we display the PincodeVerificationView(). We also need a way to know when all the digits are entered and for that we have implemented the .onReceive function for a notification in which we parse the pincode from the userInfo object.
import SwiftUI
struct ContentView: View {
@State var pincode:String = ""
var body: some View {
VStack {
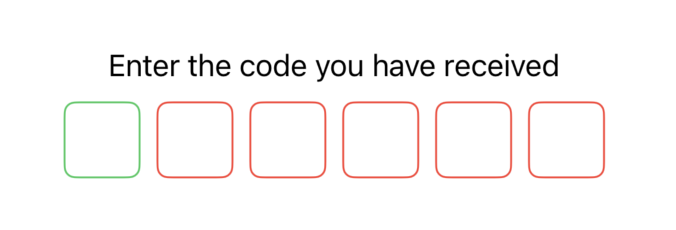
Text("Enter the code you have received")
PincodeVerificationView()
}
.onReceive(NotificationCenter.default.publisher(for: Notification.Name.init("pincodeEntered"))) { obj in
self.pincode = obj.userInfo!["pincode"] as! String
//do you validation if the code is correct
}
.padding()
}
}
The PincodeVerificationView
Below you will find the full code, which is pretty much self explanatory. We have defined a length of 6 meaning the pincode will consists of 6 digits and we will render 6 input fields.
For each instance we call the @ViewBuilder function OTPTextBox to render it. The entered digit will display as a * and we use the background modifier to set a stroke color.
We are using the onChange(of: otpText) to determine is have have our six digits and when we do, we post a notification and pass the entered code in the userInfo so the receiver in the ContentView can validate it.
import Foundation
import SwiftUI

struct PincodeVerificationView: View {
	@State private var otpText = ""
	@FocusState private var isKeyboardShowing: Bool
	let length = 6
	var body: some View {
		VStack  {
			HStack(spacing: 10){
				Spacer()
				ForEach(0..<length, id: \.self) { index in
					OTPTextBox(index)
				}
				Spacer()
			}
			.background(content: {
				TextField("", text: $otpText)
					.keyboardType(.numberPad)
					.textContentType(.oneTimeCode)
					.frame(width: 1, height: 1)
					.opacity(0.001)
					.blendMode(.screen)
					.focused($isKeyboardShowing)
					.onChange(of: otpText) { newValue in
						if newValue.count == length {
							let data = ["pincode" : otpText]
							NotificationCenter.default.post(name: Notification.Name.init("pincodeEntered"), object: nil, userInfo:data)
						}
					}
                   .onAppear {
						DispatchQueue.main.async {
							isKeyboardShowing = true
						}
					}
			})
			.contentShape(Rectangle())
			.onTapGesture {
				isKeyboardShowing = true
			}
			Spacer()
		}
	}

	@ViewBuilder
	func OTPTextBox(_ index: Int) -> some View {
		ZStack{
			if otpText.count > index {
				let startIndex = otpText.startIndex
				let charIndex = otpText.index(startIndex, offsetBy: index)
				let charToString = String(otpText[charIndex])
				Text("*")
			} else {
				Text(" ")
			}
		}
		.frame(width: 42, height: 42)
		.background {
			let status = (isKeyboardShowing && otpText.count == index)
			RoundedRectangle(cornerRadius: 6, style: .continuous)
				.stroke(status ? Color.green : Color.red)
				.animation(.easeInOut(duration: 0.2), value: status)

		}
	}
}
The complete project can be downloaded here https://github.com/arikivandeput/PincodeVerificationView.git
Comments are closed